How To Create A Facebook Business Page?
- What is a Facebook Business Page?
- How to Set Up a Facebook Business Page?
- How To Create A Poll On Facebook Business Page?
- How To Create Group On Facebook Business Page?
- Wrap-up
It is simpler for customers to find and connect with your brand online when you have a Facebook business page. Discover here how to set one up. If you have a brand, you need a Facebook Business Page. Due to its 1.82 billion daily active users, Facebook is an inevitable social network.
With more than 200 million businesses using Facebook’s free services, perhaps this is the case. That includes company pages; creating a Facebook Page is a free way to advertise your brand. The good news is that you probably already have everything you need to set up a Facebook account for your business, and it’s quite simple.
What is a Facebook Business Page?
Businesses, organization’s, celebrities, and artists can all use Facebook Pages, a form of public Facebook account. Businesses use Pages to offer contact details, promote events and new releases, post updates and content, and — perhaps most importantly — interact with their Facebook followers. Facebook Shops and Ad Accounts can both be linked to Pages.
How to Set Up a Facebook Business Page?
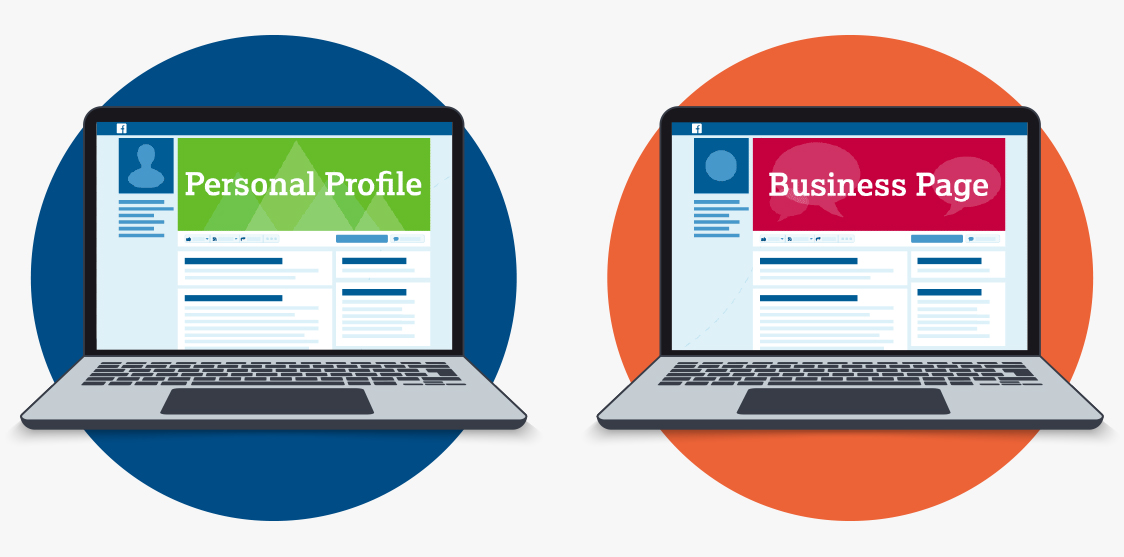
You must first log into your personal Facebook account in order to create your Facebook Business Page. The data from your personal account will not be displayed to public on your company Page.
This is because one or more page admins are in charge of each company Page. The administrators are people who have personal Facebook accounts. Your personal account is the key that unlocks your new business Page. If your team members are aiding you with your Page through their own accounts, their personal accounts will also become unlocked.
Log into your personal account immediately if you haven’t previously, then start the Page creation process.
Phase 1: Sign Up
Go to facebook.com/pages/create
Fill out the panel on the left with the details of your company. The page preview on the right will refresh in real-time as you proceed. Utilize your company name or the name that people are likely to look for to locate your business as the name for your page.
Enter a word or two that best represents your company in the category field, and Facebook will recommend a few alternatives. Up to three of the options are yours to pick from. Fill up the Description field next. This brief summary can be found in search results. It should only contain a few phrases (maximum 255 characters).
Click Create Page once you’re satisfied with your description.
Phase 2: Add Images
You will then upload a profile picture and a cover photo for your Facebook Page. Make wise choices because making a good first impression visually is crucial. Make sure the images you select are consistent with your brand and may be associated with your company.
Your profile picture will be uploaded first. This graphic appears next to your company name when you connect with users and show up in search results. Additionally, it is visible in the upper left corner of your Facebook Page.
The safest course of action is definitely to use your logo if your business is well-known. A photo of your face will be quite effective if you are a well-known person. Additionally, if your company is local, consider using a professional photo of your standout product. Helping a potential follower or buyer recognize your page right away is crucial.
Your profile image needs to be 170 × 170 pixels, as we outline in our piece on the ideal image sizes for all social media platforms. Important information shouldn’t be placed in the corners because it will be reduced to a circle.
After selecting a photo, click Add Profile Picture. The most noticeable image on your Page, the Facebook cover image, should now be selected.
Your brand personality and the essence of your company should be communicated through this image. Facebook suggests that you use a photo with a resolution of 1640 x 856 pixels. After choosing a suitable image, click Add Cover Photo.
The buttons in the top right of the preview allow you to switch between the desktop and mobile displays after you’ve uploaded the photographs. Use these to check that your photographs seem how you want them to in both displays. The images in the left column can be moved around by dragging.
Click Save once you’re satisfied with your choices.
You have a Facebook Business Page, but it is incredibly underpopulated.
Of course, even if the Facebook Page for your business has a basic structure today, there is still more work to be done before you can share it with your audience.
Phase 3: Create your Username
You can direct people to your Facebook profile by utilizing username, commonly known as your URL. Your username can be up to 50 characters long, but don’t go over that length just for show. You want it to be straightforward to type and remember. Your company name or a clear version of it is a good bet.
Select Create Username on the page preview to create your username. Your desired name should be entered. If it’s accessible, Facebook will notify you. A green checkmark means you’re ready to go. To create a username, click. You’ll receive an approval pop-up, so click Done.
Phase 4: Attach Business Details
Even though you might be tempted to save the specifics for later, it’s crucial to complete all the fields in the “About” part of your Facebook Page at the outset.
Because Facebook is typically the first place a potential customer goes for information about you, having everything there is essential. For instance, a consumer may want to confirm that your Page contains the information they require if they are looking for a store that is open till nine. They will surely keep looking if they can’t find it until they find a place that’s more accommodating.
Thankfully, Facebook makes this quite simple to do. Simply expand the item titled Provide Info and Preferences by scrolling down to the section titled Set Your Page Up for Success on your Page view.
Start by entering your website’s details in this section. Please be sure to enter any exact hours that your business is available to the public. These particulars can be found in search results. Don’t forget to finish the part titled “Add an action button.”
With Facebook’s built-in call-to-action button, it’s really simple to give customers what they want and let them interact with your company in real time. The ideal CTA button will entice site visitors to browse your store, make a purchase, download your app, or schedule an appointment.
Click the blue “Add Button” button, then select the type of button you want, to add your CTA.
You can always access these stages later if you don’t want to finish them all right once. You may find Edit Page Info by just scrolling down in the Manage Page menu on the left.
You can choose to un-publish your page at any time if you want to take your Facebook Business Page down while you work on the specifics. General can be found by selecting Settings from the Manage Page menu. To set the status to “Page unpublished,” click Page Visibility.
Phase 5: Create Your Post
Post valuable content on your company’s Facebook page before beginning to ask people to like it. You can submit your own posts or share essential articles written by industry thought leaders.
Simply select one of the options in the Make box at the top of your page to create a specific sort of post, such an event or an offer. To encourage people to stay on your Facebook Business Page, make sure everything you post is valuable to them when they first come.
Phase 6: Invite Your Audiences
Your Facebook Business Page now represents a strong online presence that will encourage interaction from followers and potential clients.
You must now gain some followers! By asking the Facebook friends you already have to like your page is the way to go. Simply expand the section titled “Introduce Your Page” at the bottom of the Set Your Page Up for Success box to accomplish this.
A list of your personal Facebook friends will appear when you click the blue Invite Friends button. Click Send Invites after choosing which friends to invite. Promote your new page using your other platforms, such as Twitter and your website. Include “follow us” logos in your email signature and marketing materials. You can also request reviews from your clients on Facebook if you feel comfortable doing so.
How To Create A Poll On Facebook Business Page?
You can offer a question to allow readers to vote for their preferred option when you add a poll to your story on Facebook.
To attach a poll to your Facebook story, follow these phases:
- Select “Add to Story” at the top of your News Feed.
- Include a picture or video.
- Click “poll” after selecting the smiley face sticker icon in the top right corner.
- To tailor the answers, type your question, then press “Yes” or “No.”
- In the top right corner, click “Done.”
- To share a story, click.
To get more information about How To Create A Poll On Facebook? , we have prepared a complete article that we recommend you read.
How To Create Group On Facebook Business Page?

- Log into the Facebook Business Page for your business from an account with administrator privileges.
- Check the left side menu for Pages. To find it, you might need to scroll and click See more.
- Select the Page with which you wish to form a group. Then select Groups from your Page’s navigation. Not seeing it? For your Page, you might need to enable groups. To do that, look into adding tabs and sections.
- Tap on Create Linked Group.
- Select your group name and select the level of privacy.
- And your group is active now!
Wrap-up
You can quickly build a Facebook business page using either your personal profile or the Business Settings. You can ensure better service to your audience and get the most out of your Facebook page by using the mentioned optimization advice.
As a result, you can manage all of your data and publish new ads if you link your Facebook Ads account to WASK. For your adverts, you can also employ optimization and smart audience techniques to help your business. WASK makes it simple to manage all of your Facebook ads in one location, optimize them with smart features, and create ad visuals using the Ad Design Tool.

Can I Create Facebook Ads Without A Business Page?
Even though you can launch a Facebook ad campaign without a Facebook business page, you will at the very least require a Facebook account. You are not required to link the ad to your personal account or company page profile just because you created an account.
Can A Facebook Business Page Create A Fundraiser?
From your new Page, you can start a fundraiser to collect funds for a Facebook-registered nonprofit. Fundraisers are visible to everyone, both on and off of Facebook. Only Facebook users are eligible to donate. Facebook doesn’t charge any fees for charitable contributions.
How To Create A Business Facebook Page Without Personal Account?
Unfortunately, you cannot create a Facebook business page or a business account without a personal account. To adhere to Facebook’s policies, you must use your own personal account to take control of a business profile.
